Are you wondering whether the Reaper Vex airbrush is right for you? If you paint miniatures for tabletop games, e.g., TTRPGs, DND, Warhammer, an airbrush is a powerful tool. Of course, there are many airbrushes to choose from. The Vex airbrush is a professional-grade airbrush, designed for the serious hobbyist or pro painter looking for rich features, reliability, and versatility.
In this post, I share my thoughts about using the Reaper Vex Airbrush in a variety of miniature painting tasks over a two year period. I’ve used this airbrush to prime miniatures, base coat large terrain pieces, and perform fine-detail work on 28mm scale figures. It’s a flexible and reliable tool that I’ve come to rely on in my miniature painting work. There are pain-points with this airbrush, however, and while not-deal breakers in my opinion, they’re worth considering before making a purchase decision.

Read on to learn more about what I think about this airbrush!
Key Takeaways
- Reaper VEX Airbrush is a professional-grade airbrushing tool with remarkable versatility, user-friendly design and precision accuracy.
- Interchangeable fine and general sized needles (estimated at 0.2mm and 0.3mm) for fine detail work and general use spray coverage.
- It includes all necessary components and accessories for painting miniatures, scale models or other artworks.
- Consider the Badger Patriot 105 airbrush as an affordable alternative with similar capability without the interchangeable coarse and fine needle convenience
- The perfect option for artists seeking a versatile, all-purpose airbrush capable of both intricate detail work and robust tasks across a range of miniature painting projects.

Overview of the Reaper VEX Airbrush
At its core, the Reaper Vex airbrush is a dual-action, gravity-feed design featuring an internal mix for maximum spray control. The materials used in the construction are high-quality, with stainless steel needle and tip and precision-machined brass body and components. Precision is the name of the game with this airbrush, from its needle stop adjustability to its micro-fine spray pattern control.
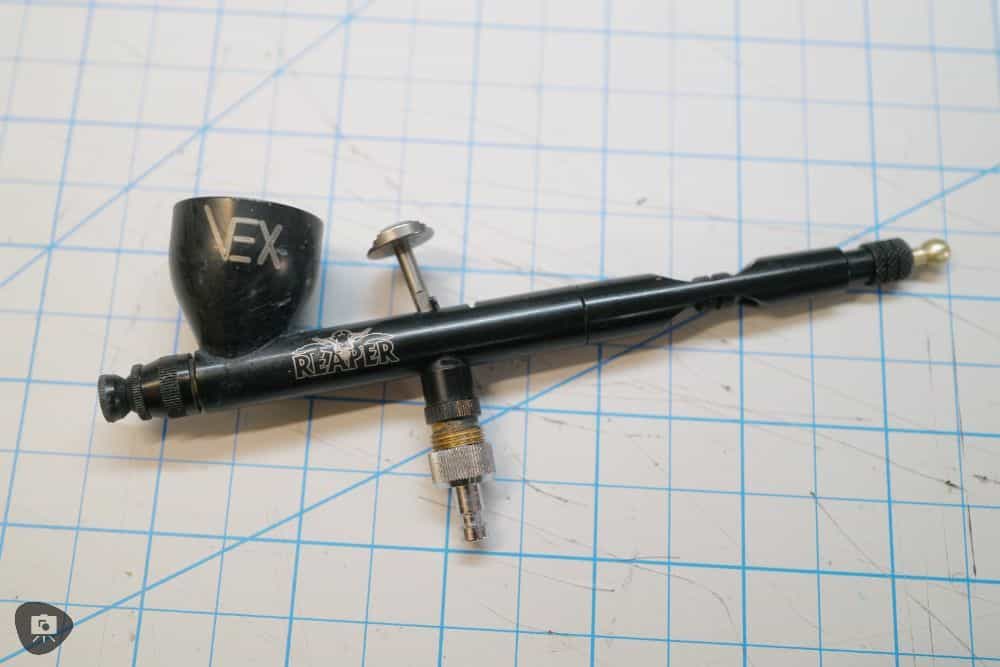
With its interchangeable needle system, you can switch out the needle quickly–without changing the nozzle–to suit your specific project needs. For miniature painters, this means you can switch between priming, base coating, shading, and highlighting without needing multiple airbrushes. Based on my use, this works well in real world practice with caveats (read about this below).
The key features of the Reaper VEX Airbrush kit include:
- Dual needle/single nozzle combination, which provides a fine to medium wide spray pattern
- Ability to swap between fine and general use needles to handle a variety of airbrush spraying needs
- Shallow or deep paint cup capacity models available (I review the deep paint cup Vex airbrush)
- Elongated body that maintains an efficient distance between the trigger and paint reservoir, ensuring good ergonomic control
- Super responsive high roll trigger for detailed spraying

Unboxing the Reaper VEX Airbrush
I bought my Vex airbrush on a whim, thinking it’d be cool to try out a new hobby tool. I tend to do this once in a while to see if it can teach me something new. Being aware of Reaper miniatures’ renowned award-winning artists, roleplaying game miniatures line, and acrylic paint brand (which I love), I decided to give their airbrush a try (check out Reaper.com for more about the company). Plus, the Vex airbrush had a reasonable price-point (around $150) compared to other professional-grade airbrushes.

What do you get with the kit?
The Reaper Vex Airbrush is an American-made product and packed in a durable plastic carry case (similar to the popular Reaper Learn to Paint Kit). Upon opening the case, I found a beautifully crafted, dark gun-metal coated airbrush with a host of accessories.

The Vex airbrush kit includes:
- One Reaper VEX Airbrush
- One Micro-Detail Needle
- One General Detail Needle
- One Protective Cap

Given that I’ve collected airbrushes over the years, I already had the air compressor, air hose, and compatible quick-release valve to hook up the Vex and start painting.

For anyone starting out, you may want to additionally purchase a compressor with an air tank and moisture trap for the best experience.

You can check out my other airbrush guide with recommended compressors to see exactly what would work best for your needs.

Shallow or Deep Paint Cup Model?
There are actually two Reaper Vex airbrush models. One has a shallow or small paint cup size, and the other has a deep or large paint cup size. My guess is that these follow the same paint capacity as the Badger Patriot 105 models, which also come in two different paint cup capacity sizes (1/3 oz or 1/8 oz).

Obviously, the deeper paint cup Vex airbrush model, which I review, is better for more general hobby tasks. The smaller paint cup gives you more line-of-sight visibility over the airbrush barrel, and hence more control when painting smaller, more intricate pieces.

If you’re not sure which model is best for you, then choose the larger paint cup Vex airbrush. The features, painting character, and parts all function the same.

The bigger paint cup will also let you perform more tasks without the need to reload paint, and perform thinning and mixing inside the airbrush directly. The latter is not really recommended, but I do it sometimes.

Setting Up Your Reaper VEX Airbrush
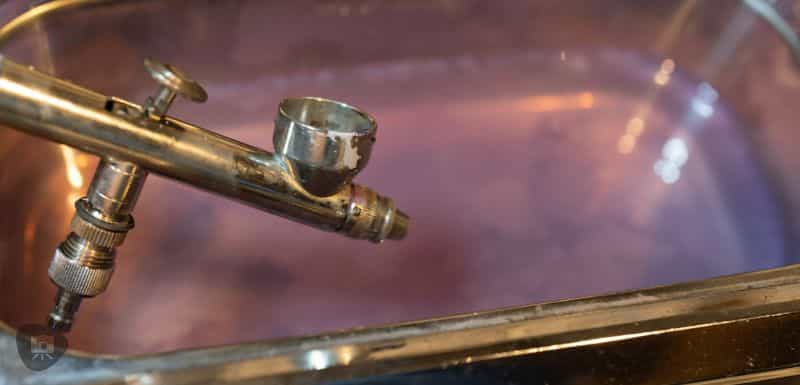
Before I put things together, I noticed a bit of machine oil perhaps from the manufacturing milling process that I wanted to wash off. A quick buzz in my ultrasonic cleaner and that solved that.

Setting up your Reaper VEX Airbrush is a straightforward process.
First, connect the airbrush to an air compressor using a 1/8” connector. Then, adjust the air pressure on the compressor to the desired level.

For my use, I start at 30 PSI and lower it from there depending on what I’m working on and the kind of paint media I’m using.

If you’re new to airbrushing, I suggest testing the airbrush by spraying water or a cleaning solution to ensure proper functioning before applying paint. Make sure you can create an even “cone” like spray pattern and that there isn’t any sputtering or spitting from the nozzle.

Preparing the Paint
You can use almost any paint in the Vex Airbrush. Even regular Citadel, Army Painter, or Reaper hobby acrylic paints work in an airbrush. However, you’ll need to thin these down to the proper consistency for the airbrush to properly atomize the liquid.
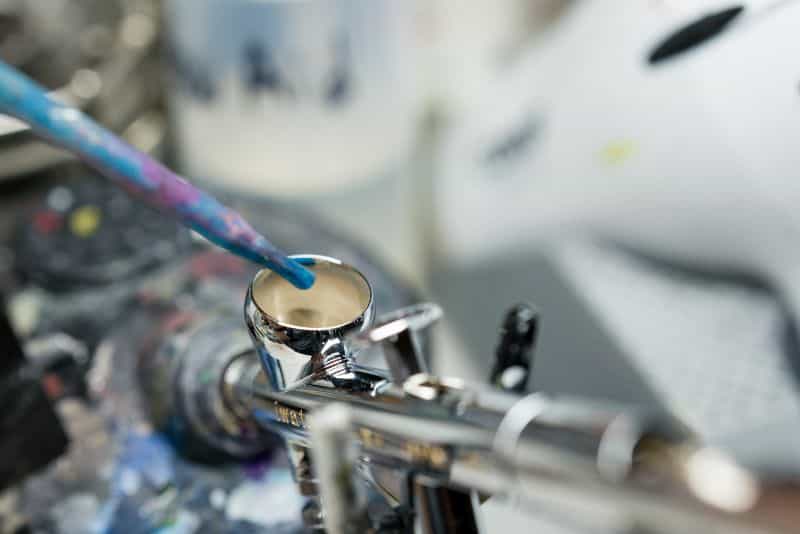
RELATED: HOW TO THIN PAINTS FOR AIRBRUSHING MINIATURES
There are a number of ways to thin hobby paints for airbrushes. The rule of thumb I use is to try and use a thickness or viscosity of paint that is similar to cream or whole milk. If you’re using the fine-needle of the Vex airbrush, then you may want your paint a bit thinner, like skim milk, and spray at a lower pressure (<20PSI).
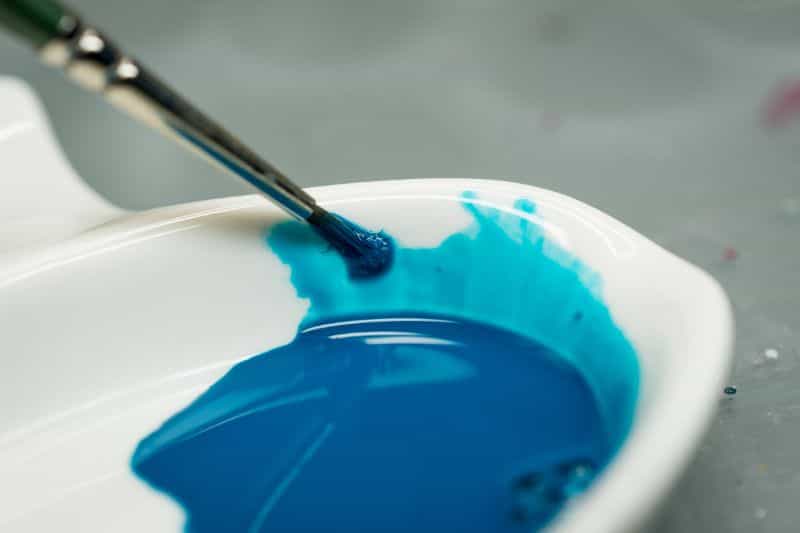
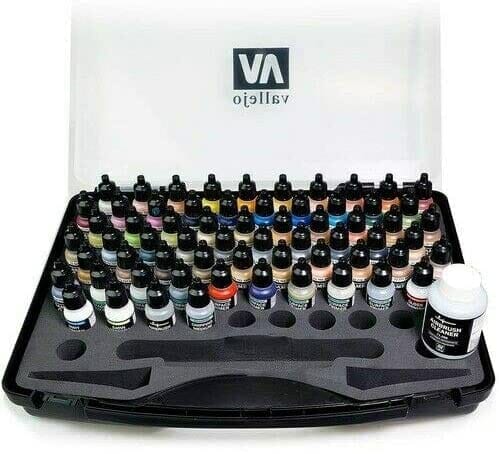
There are airbrush-ready paints that you can also use. These generally work well straight out of the bottle.
Adjusting Spray Patterns with air pressure and paint thickness
Before I start painting miniatures with any airbrush, I make sure to tune up the air pressure and paint thickness so that I can get a nice, even spray pattern.
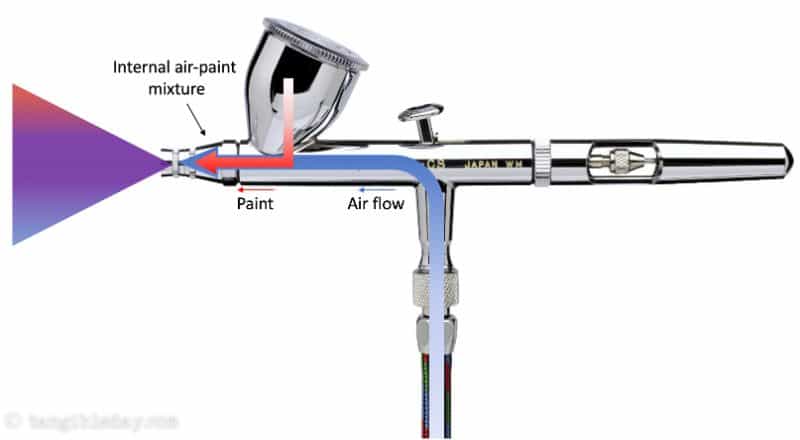
To adjust the density or “thickness” of your spray, you will need to adjust two things:
- Paint viscosity (how thick or thin your paint is)
- Air pressure (the force at which paint exits the nozzle)
Adjusting these two factors allows you to control how much paint comes out of the airbrush. You can also alter the spray pattern from a fine, small line to a wide, dispersed cone.
Does the Interchangeable Needle system work well with the Reaper Vex Airbrush? Is it Worth it?
Yes, but with limitations. The signature feature of the Vex airbrush is the ability to switch between two different needle sizes with ease and do so without changing the nozzle. With other airbrushes, including my venerated Iwata Hi-Line HP-B, which I love for very fine detail work, you have to spend extra time and expense having different needle and nozzle combos if you want to change spray patterns for specific needs.

The advantage, in theory, with the needle interchangeable system is that you have two options, and no time is required to make the switch back and forth. Just pull out one needle and insert another, easy right? In reality, it’s not that simple.

The interchangeable system works well for general painting in a typical 28mm miniatures scale. But, the time-savings you think may have isn’t really there. For one thing, you will want to clean out the paint cup and airbrush between needle swaps.

If you don’t clean up first, pulling the needle out will let your residual paint media leak out the nozzle (front end) or into the mechanical spring system (back end).

This is especially true if you’re going between thicker basecoat paints and thinner media, like inks. Worse, is if you’re painting with the airbrush, then want to swap to a varnish to finish the job.
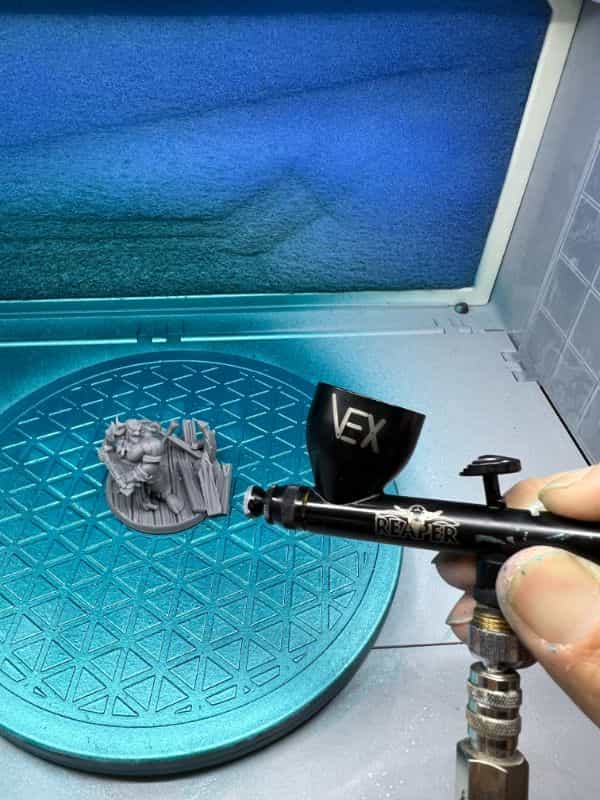
You’ll have to clean out the airbrush thoroughly first to avoid tainting the clear coat solution with any leftover pigment. This is work. And, you’d be better off simply having a second airbrush ready to go for the different media.

Overall, while the two needle system works well , it feels gimmicky if you need to use it. And, the Vex airbrush is expensive enough that I don’t think many people will have two of them in their paint studio.

On the other hand, a single Vex airbrush that gives you this versatility with a fine or general use needle would be about 30% cheaper than buying two Badger Patriot 105 airbrushes (each loaded with a different needle/nozzle combo).
Reaper VEX Airbrush in Action with Miniatures and Scale Models
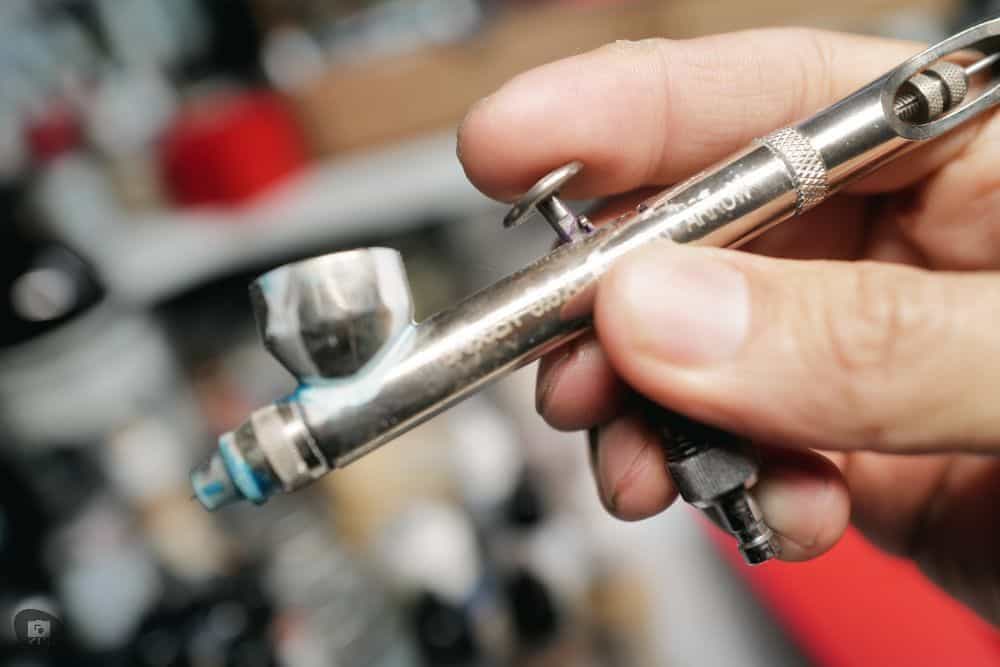
I painted a lot of things with my Reaper Vex Airbrush. From miniatures for tabletop games, to scale models for military dioramas, and a few 3D printed things I made. The airbrush excelled at model priming jobs in the spray booth, working with Vallejo Surface Primer, and even zenithal highlighting without slowing down.

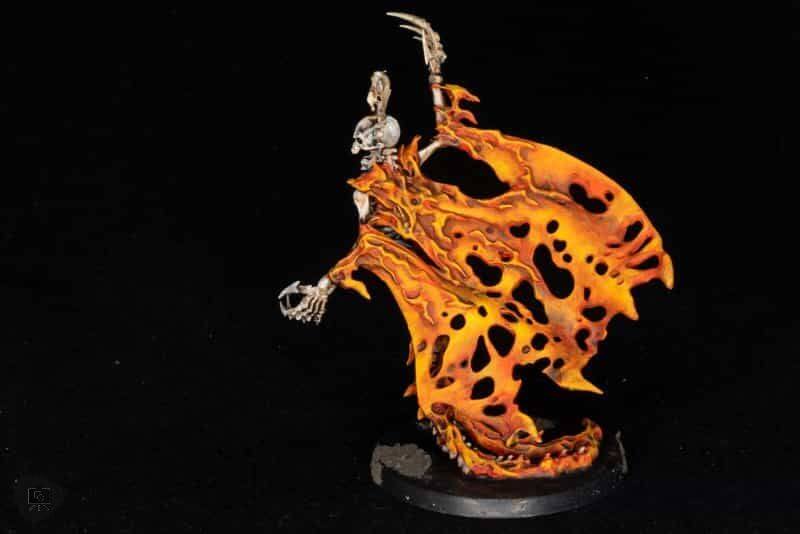
In finer detail tasks, like glazing over small areas such as I did with painting cloaks or power weapons (to create the glow like effects), the low pressure spray pattern with the fine needle insert worked really well.
Of course, the Vex isn’t a lightweight airbrush as compared with my featherweight Iwata Hi-Line. So, it took some getting used to. After a while though, the extra mass and the high-roller trigger did lend to increased steady-ness, I think.

Notably, I did enjoy how the trigger felt. As a double-action airbrush, you want control over air flow and paint at the same time. In this regard, the Vex airbrush trigger pull was comfortable, smooth, and predictable. The extra height did feel weird at first, but then again, it was a matter of muscle memory.

How Does the Vex Do with Finer Detail Spraying?
In general, I preferred my other airbrushes when it came to the finer, close detail work on models than the Vex. The nozzle and fine-needle combo required that I sprayed at a bit higher air pressure even with thinner paint media to ensure a good, even spray without any spitting.

When it came to the finer, detail work, I honestly didn’t think the Vex compared well against the higher end precision airbrushes. The Vex airbrush did come close to my Badger Sotar 20/20 airbrush in terms of the clean, tight atomization required for a smooth and even spray application with low air pressure spraying.
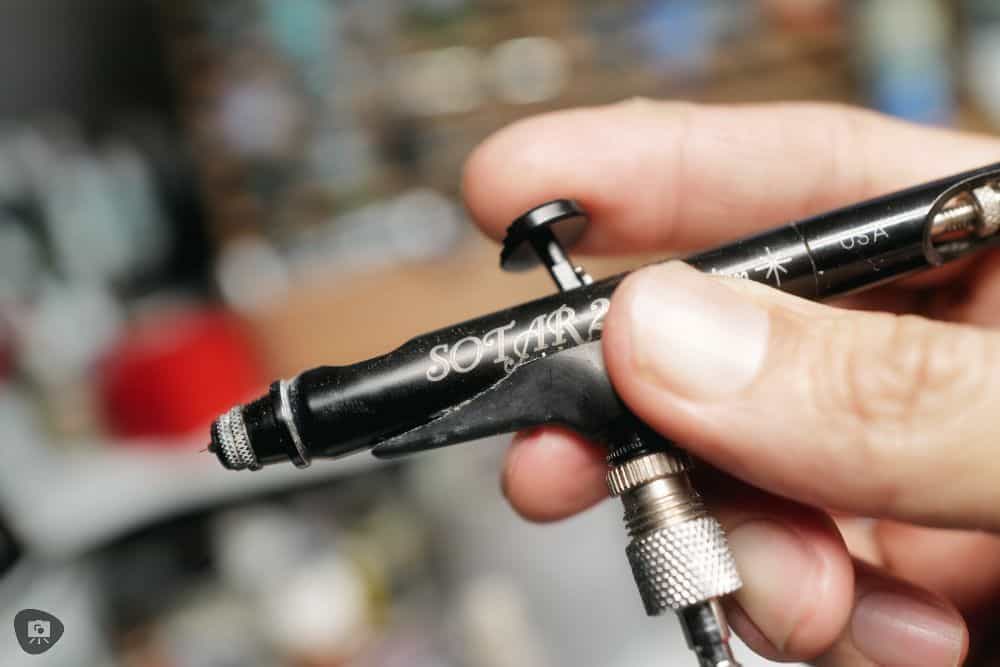
Of course, you’re talking about comparing the Vex against more expensive, task-oriented airbrushes. The Vex has a flexibility that these airbrushes do not have with its ability to use the larger, general-needle size with the same nozzle.
Look and Feel
I love how the Vex airbrush looks. It’s got a wonderfully dark gun-metal finish, close to that of the Badger Renegade airbrush. The entire airbrush feels weighty, not a toy for sure, and strong. I could properly crack a bathroom tile if I dropped it.

In terms of specific ergonomic features you’ll find in the Vex, here they are:
- Longer barrel grip for more surface area for your hand to control the airbrush.
- Taller trigger for greater precision in the air flow and paint mixture.
- Reversible needle protector cap.
- The design of the rear barrel is exposed, allowing access to the needle tightening chuck without the need to remove the barrel.
- Rear trigger pull limiter to prevent overspray (I rarely used this).
- The nose cone design of the open flair allows for better visibility of the needle during spray operation, enhancing the overall user experience (though this increases the risk for needle damage; be careful).

Overall, I have zero complaints about the feel and comfort of using the airbrush. It is a bit heavy compared to other airbrushes. But, it’s par for the course for a Badger-designed airbrush; almost all of their popular airbrushes feel dense, except for the Sotar 2020.
Who is the Reaper Vex Airbrush For?
Given it’s flexibility, I would recommend the Reaper Vex Airbrush to those of you who want to spend a bit more (but not too much) and still have the ability to do all the common, popular tasks that miniature painters and scale modelers would want. While it is not super amazing at any single thing, the Vex is broadly useful.
Here’s who may find the Vex most suited for their paint studio:
- Intermediate to advanced miniature painters
- Scale modelers who work at various scales
- Artists who want an airbrush that can handle larger projects too
- Hobbyists who have a limited budget and need one versatile airbrush
If you’re dabbling into airbrushes now, the Vex airbrush is a great starter airbrush that will carry you through almost any of your hobby painting needs, no matter how ambitious you become. For veteran artists, this is the workhorse airbrush you reach for when the Badger Patriot 105 (or its closest Iwata competitor) aren’t tickling your fancy.
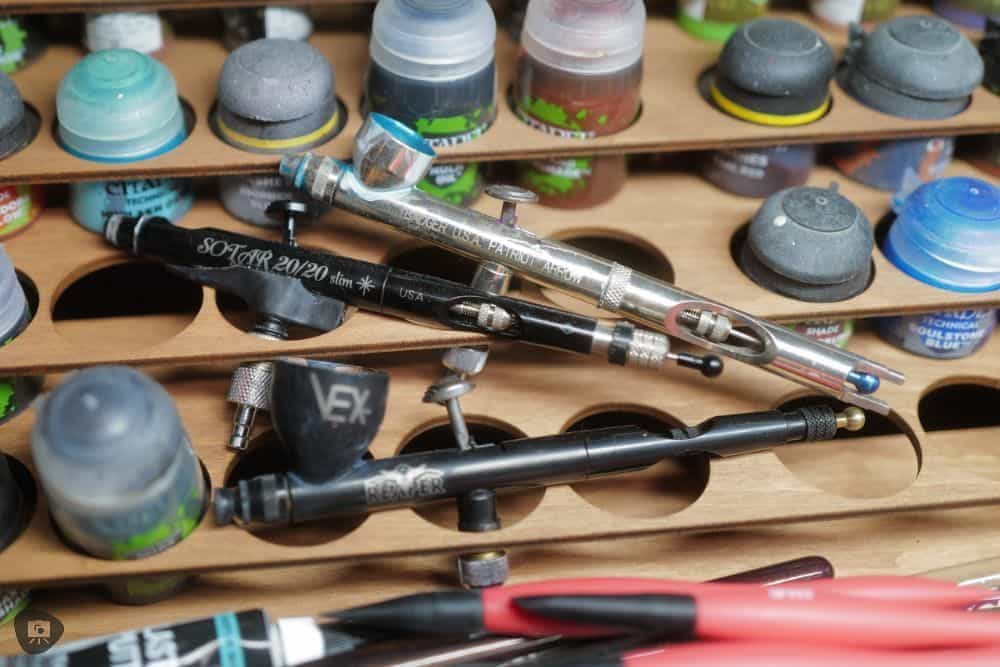
In my work, I tend to bounce between the Vex reaper airbrush for the early stages of a painting project, e.g., basecoating, priming, and then move on with a lighter weight precision airbrush if I’m performing more advanced, meticulous work for the details on a model; techniques such as glazing or stenciling.
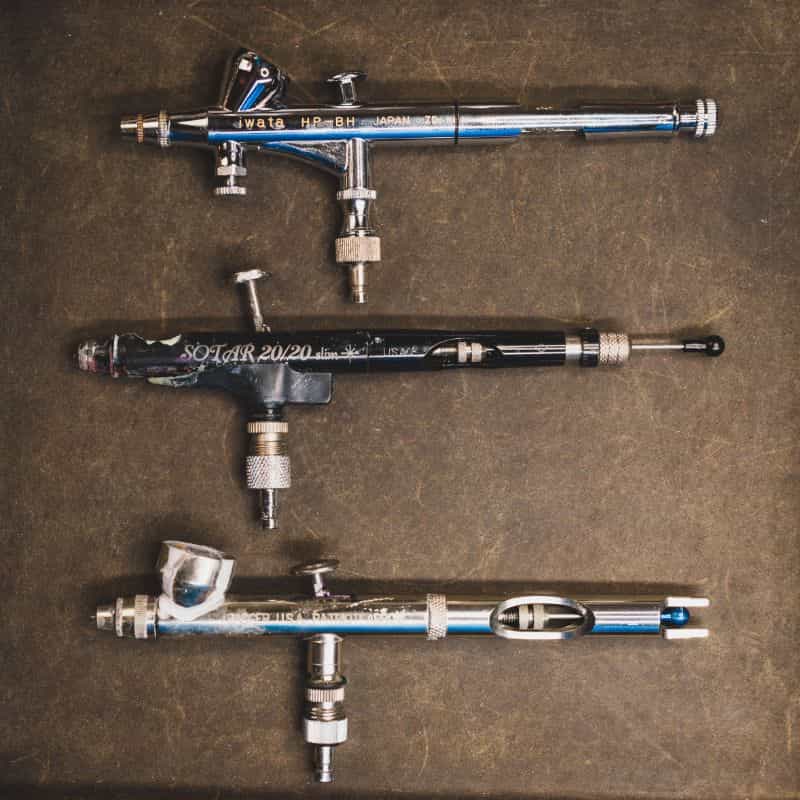
Tips and Tricks for Using the Reaper VEX Airbrush
To maximize the benefits of your Reaper VEX Airbrush, keep in mind a few handy tips. Firstly, remember to maintain an appropriate distance and provide a controlled spray while using the airbrush. These practices guarantee optimal results and a professional touch.

Additionally, consider when to use the small needle for detailed work and the large needle for broader coverage. Finally, be sure to practice regular cleaning and maintenance to keep your airbrush functioning at its best.
Efficient Distance and Controlled Spray
Maintaining an efficient distance and controlled spray with your Reaper VEX Airbrush is crucial for achieving the best results. First, adjust the distance between the airbrush and your working surface being painted. This distance will vary depending on the desired effect and the type of paint.
To control the spray, adjust the air pressure accordingly. Higher pressure will result in a wider, more intense paint spray pattern, while lower pressure will create a more diffuse spray. The window for optimal air pressure that you should use depends on a few factors, including how thin your paint is, the distance to your model that you’re painting, and the size of your needle/nozzle in the airbrush.
You’ll have to experiment and play around with your particular setup. As a starting point with the Reaper Vex Airbrush, I set my air pressure around 20-25 PSI for general work on tabletop scale models.
Note that I use the general sized needle in the Vex reaper airbrush almost 90% of time. If I switch to the fine-sized needle to airbrush extra-thinned paint or ink, then I’ll lower the starting air pressure to avoid spidering or spitting effects on my miniature surface.
If you’re trying to avoid over spraying on parts of your model, then you can use masking techniques to protect areas that should not be painted, ensuring a cleaner finish. Two masking tools I use frequently when I’m masking is tacky putty and liquid frisket.
Cleaning and Maintenance
Routine cleaning and upkeep are key to maintaining your Reaper VEX Airbrush in peak condition and guaranteeing its best performance.
Here’s how I do it after each painting session.
Rinse the paint cup with water, spraying out the excess. I do this a few times, cycling clean water until I’m satisfied most of the paint is out. Then, using a small piece of tissue paper I wipe the interior of the cup clean. I do a final rinse with clean water, spraying out the excess, then allow the airbrush to dry.
I don’t use a special airbrush cleaner. I’ve found it unnecessary if I clean out my airbrush immediately after each use (before paint dries inside the nozzle).

Bigger bits of dried paint may require some disassembly, e.g., removing the nozzle for a more thorough wash, but I do this rarely. Use a sharpened wooden toothpick (never metal!) as a reamer to help remove any dried paint.
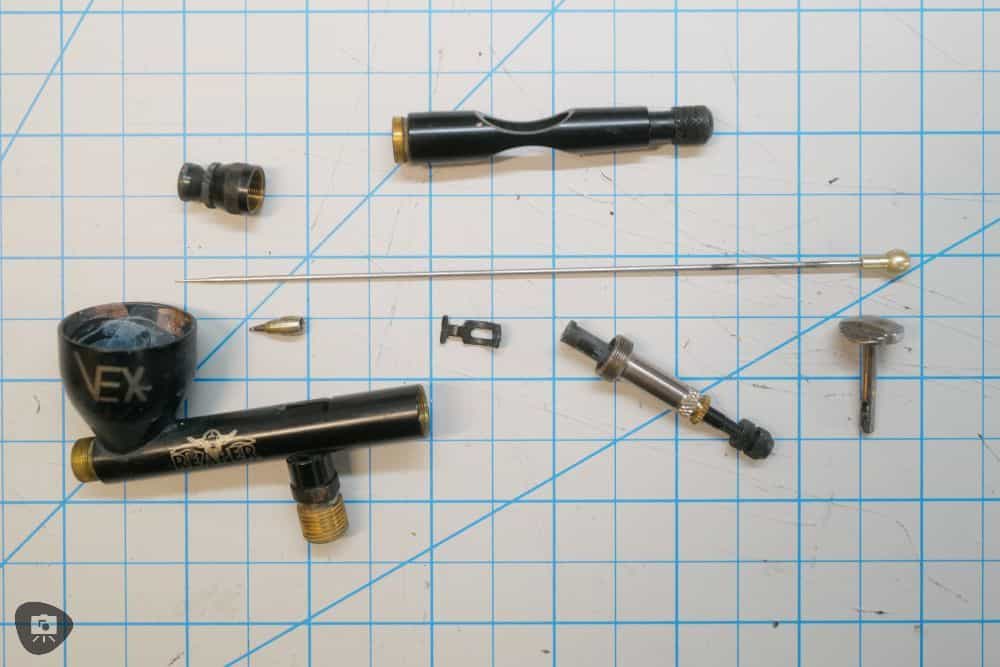
If necessary due to clogs or other issues, you can take apart the rest of the airbrush and clean each component individually. In a full disassembly to clean my airbrush, I lay it out on a flat surface so parts don’t roll away. Feel comfortable doing this every few weeks or so, or more if you paint a lot.

For proper ongoing service, remember to regularly check the needle and nozzle for damage. A bent needle should be fixed (you can try to do this) or replaced. A cracked nozzle will always need replacement for proper spray function.

Additionally, lubricate any movable parts with a small amount of airbrush oil to ensure smooth operation. You only need a tiny, teensy dab of oil inside your Vex airbrush for it to work amazing.

I mentioned earlier that I use an ultrasonic cleaner to clean my airbrushes. However, make sure if you do this to avoid placing your needles into the cleaning bath. The harsh sonic vibrations inside an ultrasonic cleaner can dull or damage your needle. The needles should be cleaned by hand only.
Summary for maintaining your Airbrush
| Maintenance Step | Procedure |
|---|---|
| Routine Cleaning After Each Session | 1. Rinse paint cup with water, spray out excess; repeat until most paint is out. 2. Wipe the interior of the cup using a tissue paper. 3. Do a final rinse with clean water and let airbrush dry. |
| Airbrush Cleaner Usage | Not typically necessary if the airbrush is cleaned immediately after each use. |
| Handling Dried Paint | For larger bits of dried paint, consider disassembly, like removing the nozzle. Use a sharpened wooden toothpick (not metal) to remove dried paint. |
| Full Disassembly | If needed due to clogs, disassemble the airbrush and clean each component separately. Lay parts on a flat surface during cleaning. Consider doing this every few weeks or more frequently based on usage. |
| Checking Needle and Nozzle | Regularly inspect the needle and nozzle. Straighten or replace a bent needle. Always replace a cracked nozzle. |
| Lubrication | Lubricate movable parts with airbrush oil. Only a tiny amount of oil is required for smooth operation. |
| Ultrasonic Cleaner Usage | An ultrasonic cleaner can be used for cleaning, but needles should not be placed in the cleaning bath due to the risk of dulling or damage. Needles should be cleaned by hand. |
What kind of art media can I airbrush?
The VEX Airbrush offers versatility for artists and hobbyists, accommodating various art media. From finely pigmented paints to watercolors, inks, low viscosity acrylics, and even water-soluble varnishes, this airbrush can handle them all.
Best Hobby Paints to Use with the Reaper Vex airbrush?
You can use any hobby acrylic paints in your airbrush with proper thinning. I’ve used every brand of popular hobby paints in my Vex airbrush at this point, and they work well. Experiment! Make sure to play around with your thinning ratios for best results.
Here are 7 popular airbrush paints that work well with the Vex airbrush for painting miniatures, scale models, and other creative projects:
- Reaper Master Series Paints: These high-quality, water-based acrylic paints offer high pigmentation, rapid drying time, and a smooth finish.
- Vallejo Model Air: A popular choice among miniature painters, Vallejo Model Air is a water-based acrylic paint that is highly pigmented, fast drying, and provides a smooth finish.
- The Army Painter Warpaints: These non-toxic, water-based paints offer highly pigmented, fast drying, and smooth finish results, making them a great choice for use with the Reaper VEX Airbrush.
- Citadel Air: Known for its high pigment concentration, quick drying time, and smooth finish, Citadel Air is a water-based acrylic paint that works well with the Reaper VEX Airbrush.
- Tamiya Acrylics: Tamiya Acrylics are highly pigmented, fast drying paints that provide a polished finish and are compatible with the Reaper VEX Airbrush. These are especially popular for scale modelers and gunpla figure painting.
- Createx Colors: These non-toxic, water-based paints offer high pigmentation, rapid drying, and a smooth finish. They tend to dry with a glossy finish and are very durable colors, which make them useful for painting RC vehicles and other items that need a tough finish
- Badger Air-Opaque: An affordable, budget alternative to other airbrush ready paints with a variety of uses. These work really well straight from the bottle with the general needle size in the Vex airbrush using 25-30 PSI air pressure. Expect broad and efficient coverage.
Conclusion
After extensively using the Reaper VEX Airbrush for two years, I’ve come to recognize both its strengths and limitations. While it brings certain professional-grade features and versatility to the table, it’s not without its quirks. Its ergonomic design and adaptability serve well in many tasks, from priming to fine detailing. However, like any tool, it’s not a one-size-fits-all solution.
There were moments where I felt other airbrushes outperformed it, especially in ultra-fine detail work. The weight may bother some of you (I was like it). The dual needle system may be cool at first, but I wasn’t keen on spending the time using it as often as I expected. But, of course, I do own other airbrushes.
If you’re like me, you may relegate this to workhorse tasks more often, and use other precision brushes for finer detail work. If you want more versatility out of it, you may want to give the fine needle set more run-time.
Nonetheless, for those willing to navigate its nuances, the Reaper Vex offers a balanced blend of precision and flexibility. Based on my hands-on experience, it’s a solid option for those looking to diversify their toolkit. It’s worthy buy in this case!
I hope you enjoyed this review. What do you think? Is the Vex airbrush something you’re interested in? Questions? I’d love to hear from you. Leave a comment below. 😀
Enjoying Your Visit? Join Tangible Day
Free newsletter with monthly updates (no spam)
Leave a comment below! Follow on X, Instagram, and Facebook.


Tangible Day on YouTube (Miniatures and More!)
